Five-Second Testing measures the first impressions of your design. Participants are presented with a stimulus for a brief time (e.g. five seconds) then answer questions about recall, emotional responses, likeability, and more.
Five-Second Testing works for advertisements, product packaging, brand assets, landing pages, and more.
You can launch five-second testing with a ready-made template or you can add it to existing survey.
The survey flow includes 5 questions for each of the three ad variations.
Five-Second Testing can be automatically translated to more than 30 languages.
Bring your own respondents or source real human respondents swiftly and at scale through us.
How five-second testing works
Five-second tests use a monadic design and typically follow this sequence:
- Pre-exposure: Participants receive instructions about the test but not about specific aspects they should focus on.
- Exposure: The design appears on screen for your chosen duration, typically five seconds.
- Recall: The design disappears and participants immediately answer questions about what they saw.
- Evaluation: Participants provide feedback on their impressions and emotional responses.
Typical questions include recall of key elements, brand recognition, emotional reactions, likeability, likelihood to engage, and overall impressions.

A versatile five-second testing solution
Five-second testing supports images, videos, and text-based stimuli with custom exposure duration, from 1 second to the standard five seconds or longer.
Combine it with other product and pricing research tools and question types for comprehensive insights.
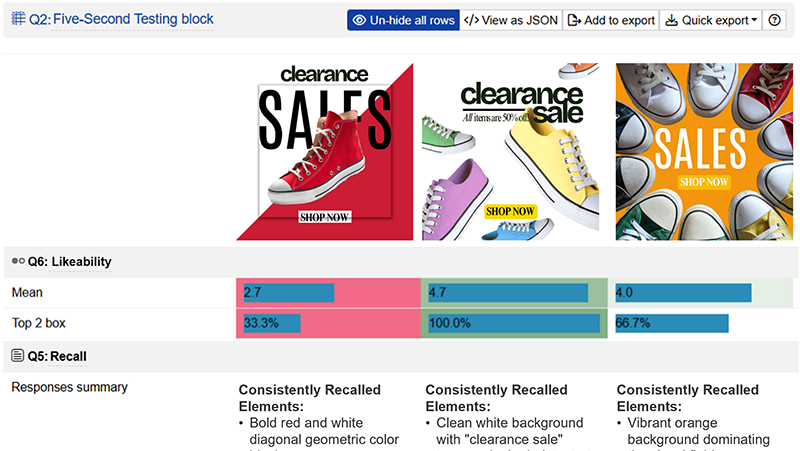
Main outputs of the Five-Second Testing

Table of outputs for each question
Summary metrics for each question and stimulus enable quick comparison, with the option to drill down into detailed results.

Detailed question output for a particular stimulus
View detailed statistics for each question, including response distribution, medians and ranges.

AI text analysis of respondent feedback
View summaries of open-ended responses, revealing respondent recall, associations, and open-ended feedback about your design.
How to set up five-second testing on Conjointly
Get started with the ready-made template following the steps below. Alternatively, you can also add it as an additional question to existing surveys.
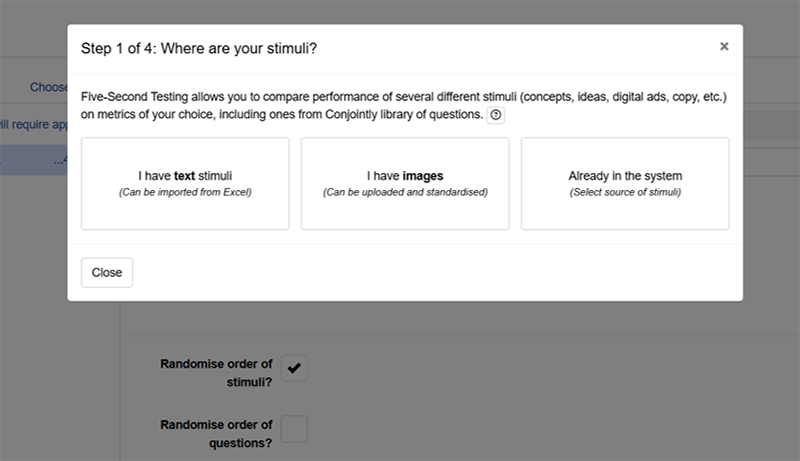
Step 1: Choose your stimulus type
Select how you want to add your test materials:
- Text stimuli: Add directly or import a text list from Excel.
- Images: Upload and standardise for consistent display across devices.
- Already in the system: Select from previously uploaded stimuli.
Video stimuli can be added later when customising your survey before launch.
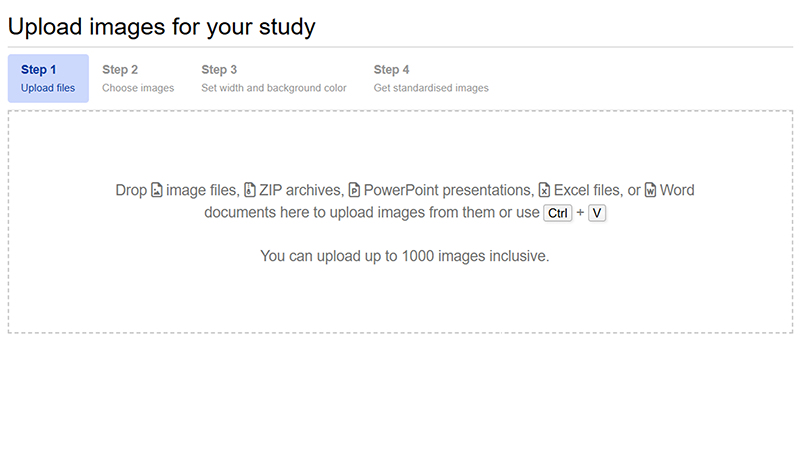
Step 2: Upload your stimuli
Upload your materials following the guided steps for your selected stimulus type.
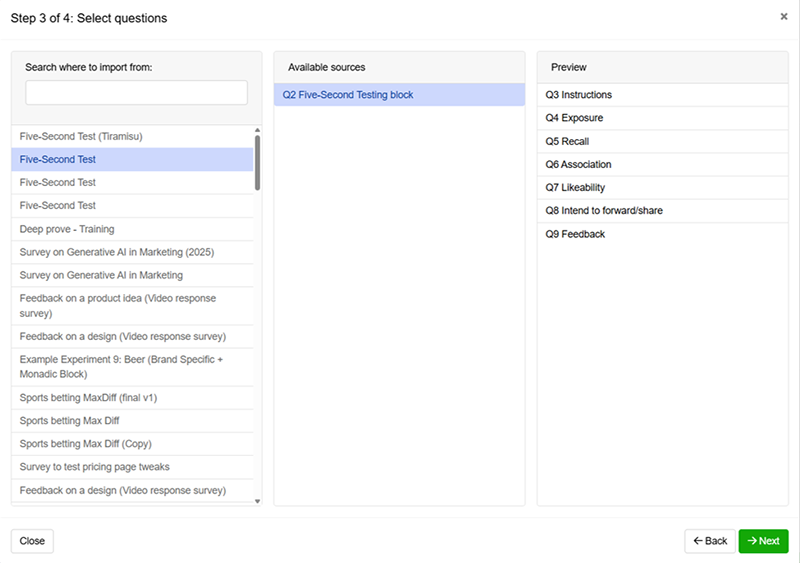
Step 3: Select your questions
The template includes default five-second testing questions covering instructions, exposure, recall, and feedback. You can use these as-is or import additional question blocks from any of your previous surveys to customise your test. The preview panel shows the complete question sequence of the selected question block.
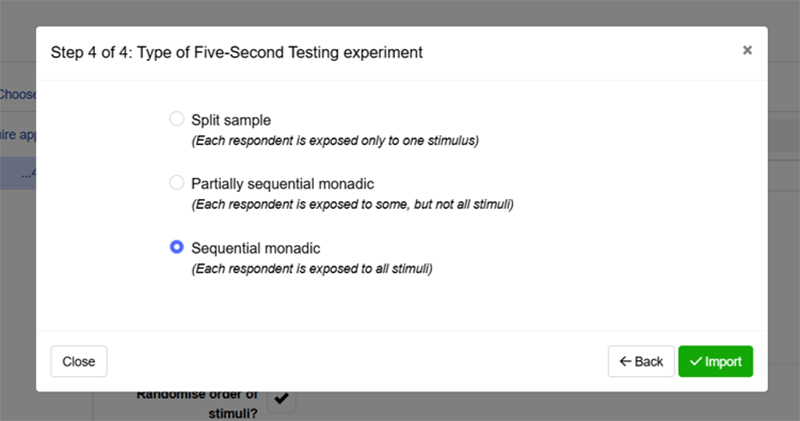
Step 4: Choose your test design
Select how respondents will view your stimuli:
- Split sample: Each respondent evaluates one stimulus. Needs larger sample but eliminates order and fatigue effects.
- Partially sequential monadic: Each respondent evaluates a subset of stimuli you define. More efficient than split sample while limiting order effects.
- Sequential monadic: Each respondent evaluates all stimuli. Most sample-efficient but best suited for testing a small number of stimuli to avoid respondent fatigue.

Step 5: Customise and launch
Your experiment is now ready for launch. Apply optional customisations below if needed or proceed to select your target audience and click on to launch your experiment.
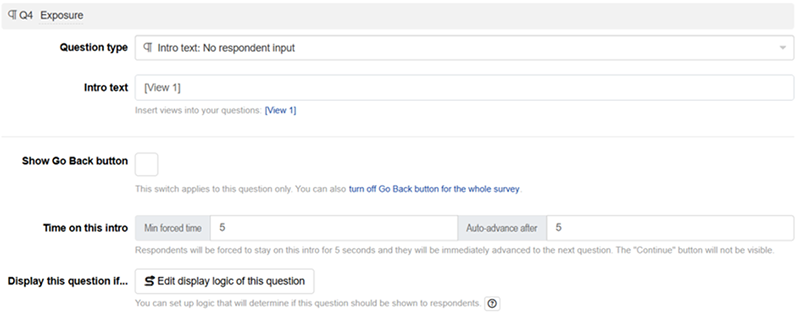
Setting exposure duration
Control how long respondents view the stimulus before answering questions with the following settings:
- Min forced time: Minimum viewing duration before respondents can proceed (minimum 1 second, or leave blank for no restriction).
- Auto advance after: Time until automatic progression to the next question (leave blank to disable).
The forced time must be shorter than the auto advance time. When auto advance is set longer than forced time, a “Continue” button appears after the forced time, allowing respondents to proceed at their own pace before automatic advancement.
Adding questions to your test
You can configure what respondents answer after viewing your stimuli through drag and drop additional question types into the five-second testing block.
Beyond the default recall and feedback questions, consider adding Likert-scale and multiple choice questions to measure emotional response, likeability and other metrics, as well as including open-ended questions to capture key messages and associations respondents make with your design.
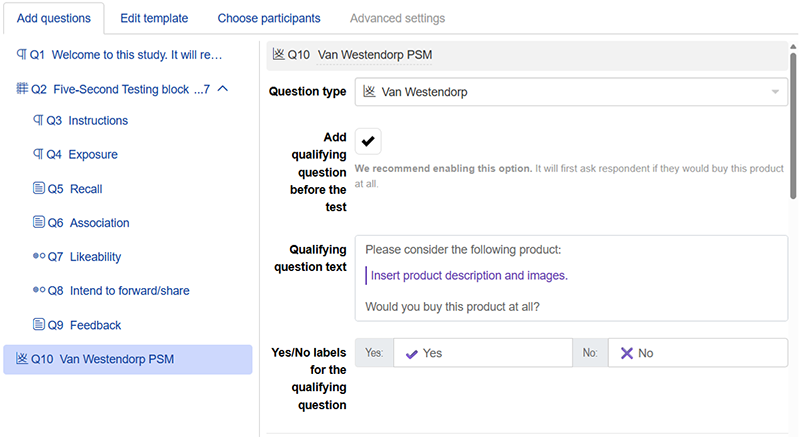
You can also add questions outside the five-second testing block to integrate other research methods, such as MaxDiff, conjoint analysis, Van Westendorp pricing, or standard survey questions.
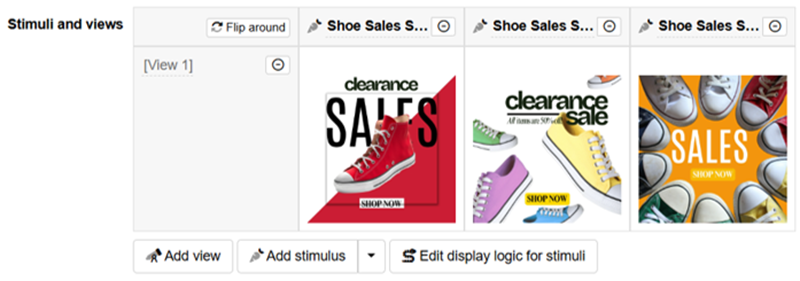
Managing stimulus views
Add, remove, or modify views for each stimulus. Views let you show different representations of your design in the exposure question. You can add videos, images, long descriptions, use fancy formatting, and many more.
Stimuli display as columns by default. If you have a long list of concepts and only a few views, you can flip around the table to display stimulus as rows instead of columns.
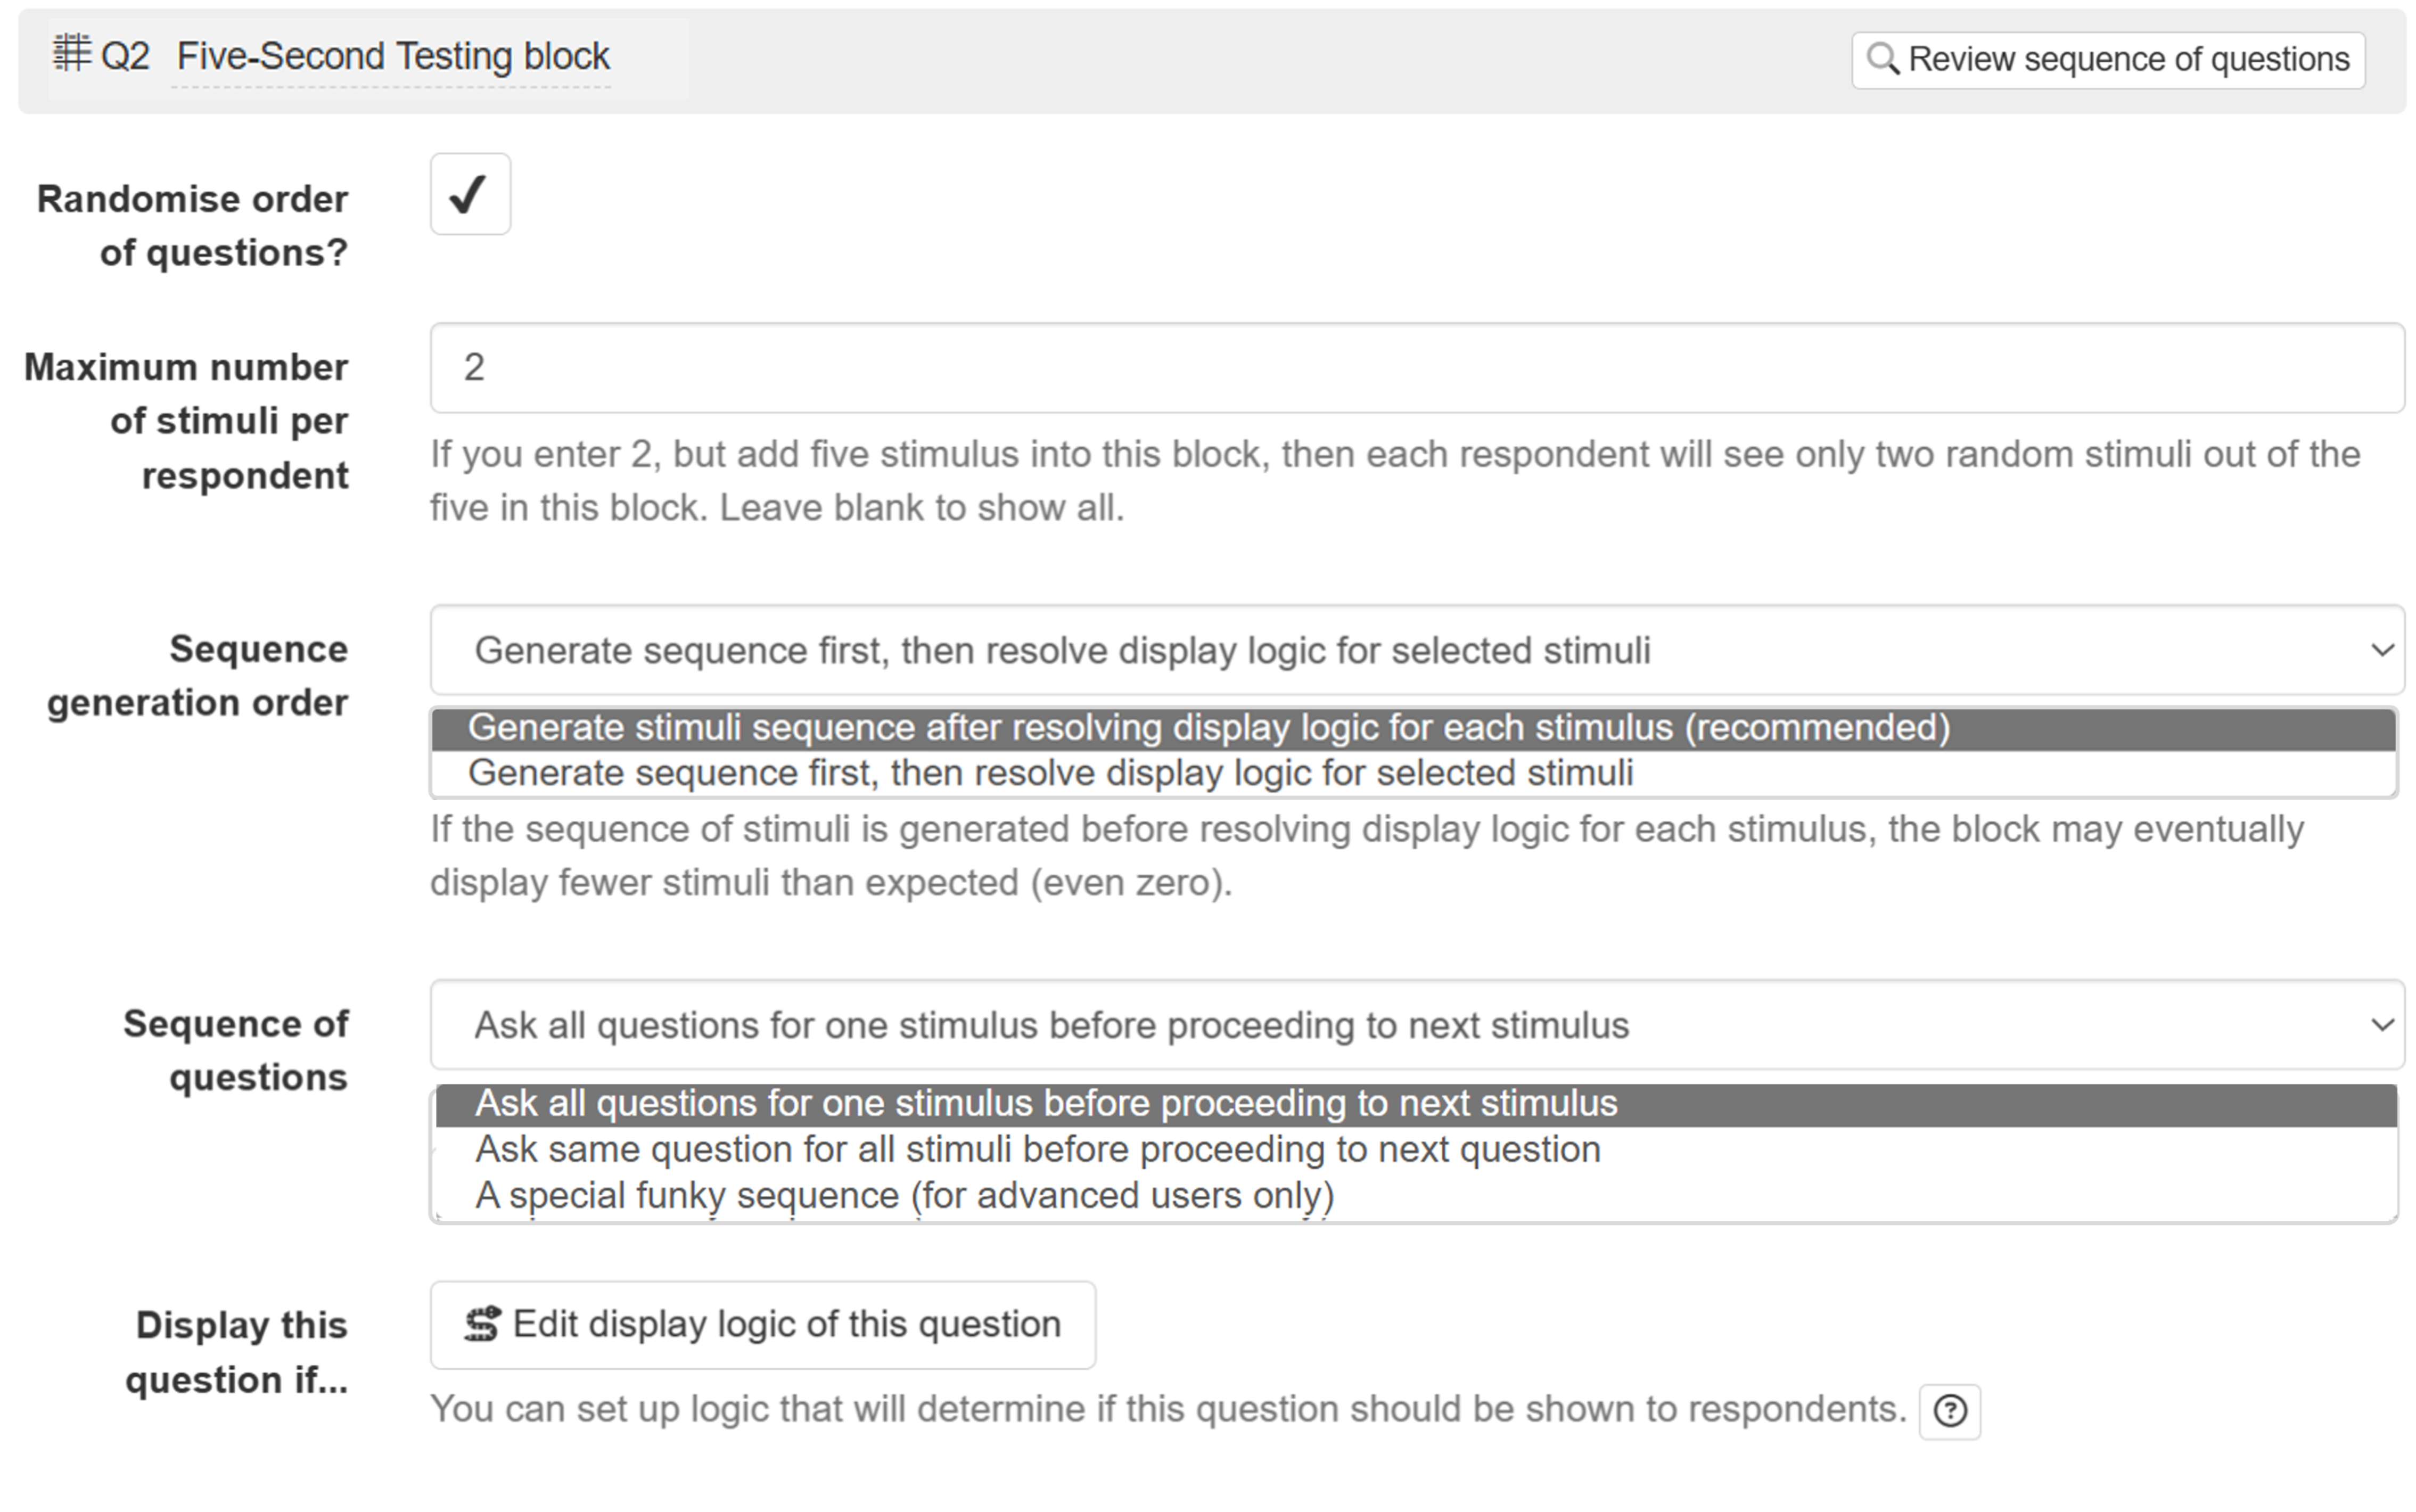
Managing survey flow
Modify the following parameters to change the flow of the survey:
- Randomise order of questions allows the system to vary the order of the questions inside the monadic block in order to reduce respondent bias.
- Maximum number of stimuli per respondent helps you get more detailed feedback for each concept without introducing survey fatigue.
- The sequence generation order setting lets you determine whether the stimuli sequence is generated before or after the display logic for stimuli is resolved. Resolving display logic first is recommended to prevent respondents from seeing fewer or no stimuli.
- Sequence of questions allows you to choose between asking all questions about one stimulus before moving to the next stimulus, asking the same question for all stimuli before moving to the next question, or using a special funky sequence.

Step 6: Choose respondents
Five-Second Testing typically requires between 100 and 1,000 participants, depending on the total number of variants. The system displays the recommended sample size for your experiment on the left-hand panel.
With access to millions of survey participants from around the globe, Conjointly provides high-quality sampling options to match your specific needs. Conjointly has achieved ISO 20252:2019 certification for its sampling services (Annex A), confirming that both fully-managed Predefined panels and automated Self-serve sample meet international standards for market research quality.
You can also bring your own respondents or send an email campaign to distribute surveys to your existing contacts.
Once you are ready with your setup, preview the survey as a participant to test your setup before launching to your target audience.
Adding five-second testing to existing surveys
You can integrate five-second testing into any existing survey through the add question modal:
- Click on .
- Navigate to Add a flow control or a block .
- Select Five-Second Testing.
- Configure your stimuli and settings accordingly.
