Camera verification
The Camera verification question type serves as an additional quality check to confirm a respondent is a live person before they proceed. Rather than asking a standard question or gathering input, it performs a short liveness check and outputs a pass-or-fail result for survey flow control and display logic.
The check confirms a live person and rejects spoofs such as printed photos, photos or videos shown on a screen, 3D masks, and deepfakes. It is intended to reduce bot, click farm, and fraudulent completions, alongside the existing response quality checks.
While camera verification effectively confirms a live user, requiring a device with a working camera and explicit access permissions will reduce your total respondent pool and increase drop-off rates.
What does Camera verification do?
Camera verification is informational. On its own, camera verification does not screen out, redirect, or otherwise change the respondent’s path. It produces a single signal, pass or fail, that you can act on elsewhere in the survey.
The result is accessible via the answer function:
- Returns
Trueif the respondent passed the camera check. - Returns
Falseif the respondent failed the camera check. - Returns
Undefinedif no result was produced.
Because the question only provides a signal, its implementation is flexible. You reference the result in display logic or in formulas to decide what happens next, for example to flag the respondent, show a different message, or branch the survey flow.
To make this easier, adding a Camera verification question actually inserts two items into your survey: the Camera verification question itself, which produces the signal, and a Flag as low quality logic block, which acts on it. By default, the logic block flags respondents who fail the check as low quality, so the question works out of the box without any further setup. You can edit or replace the logic block to suit your own survey. See Setting up a Camera verification question and Using the verification result for details.
Camera verification is a paid add-on and does not require a Conjointly licence. A charge of USD 0.05 per survey entry is applied (via a pending charge to the primary owner of the experiment). To launch an experiment that includes a Camera verification question, you need at least USD 100 on your prepaid balance.
How it works
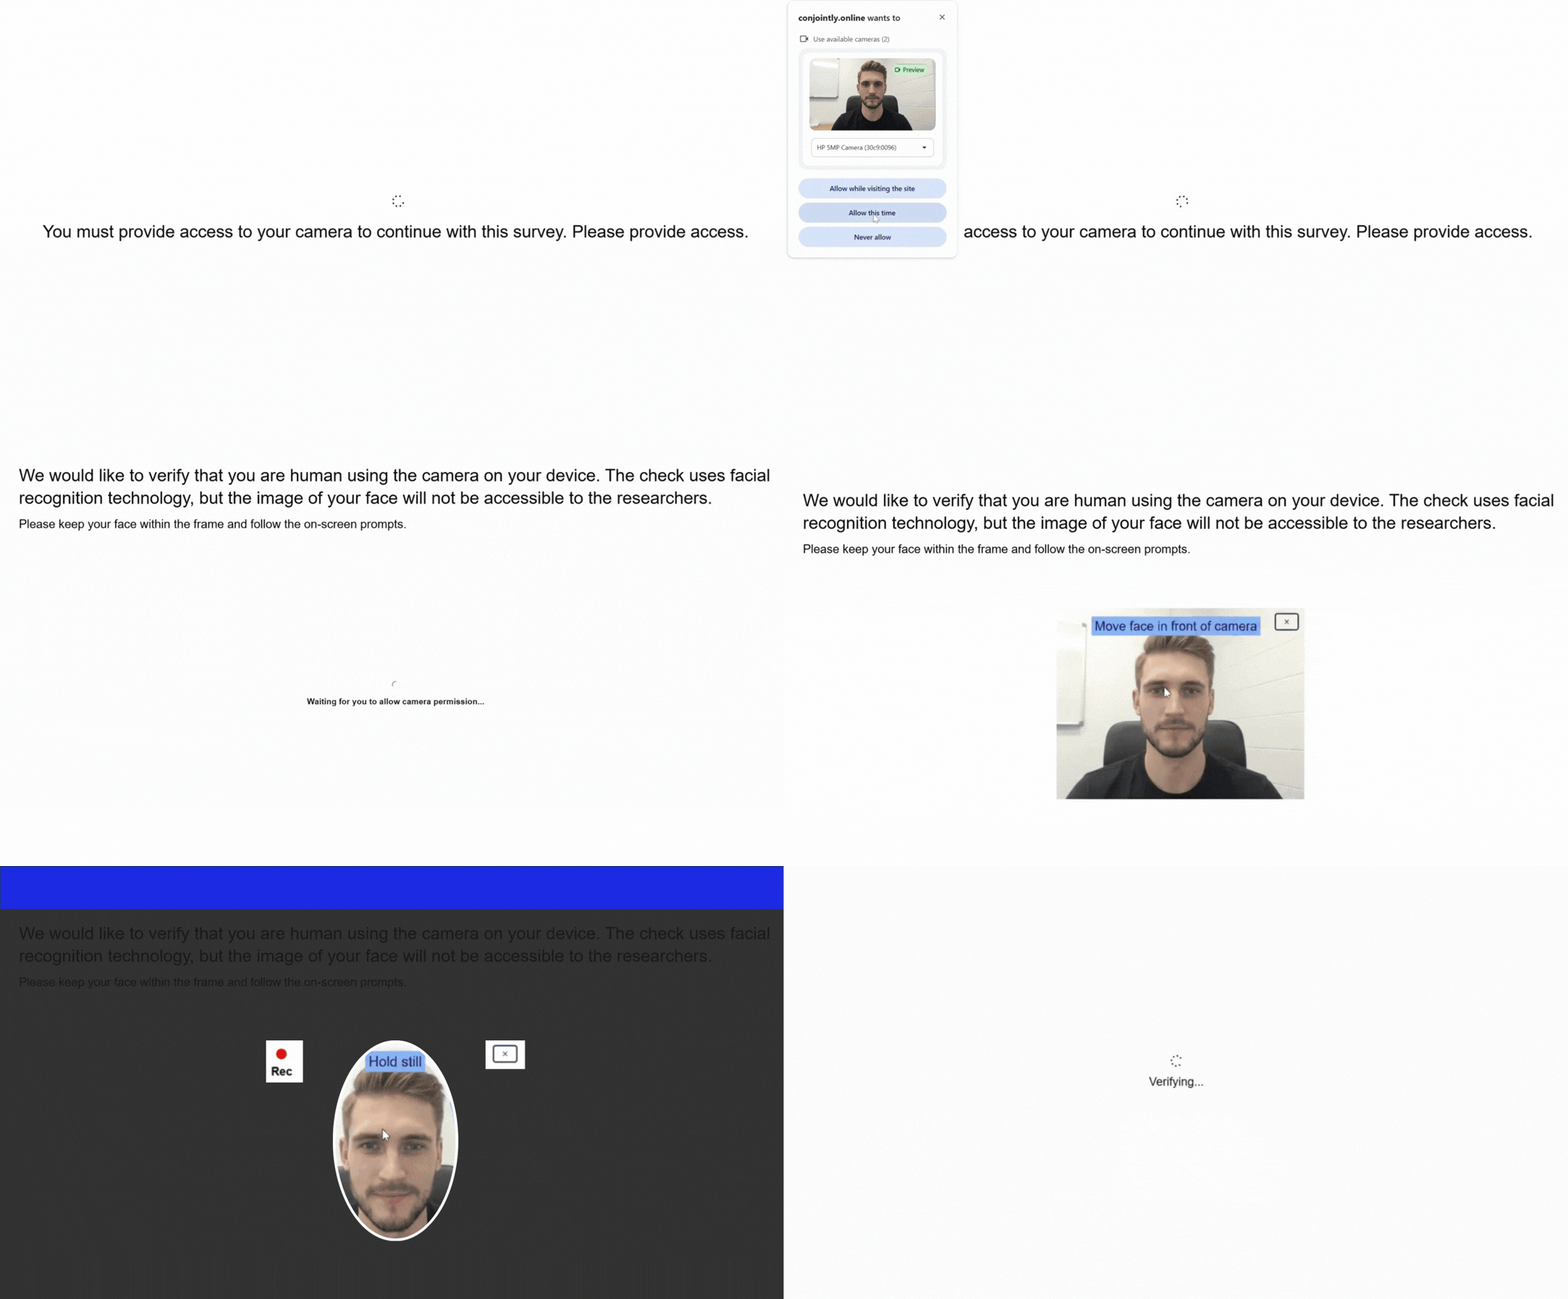
When a respondent reaches a Camera verification question, they are first prompted to grant the browser access to their camera before continuing. When a respondent lacks a camera or declines access, the system simply records the question as unanswered without generating a result. If you want to automatically disqualify or redirect these respondents, you need to set up additional screenouts and redirects.
Once access is granted, they are told that the next step is camera verification and are asked to position their face inside the oval on the screen, moving closer or further away until they are correctly positioned. When in position, they are asked to hold still while a pattern of various colours flashes across the screen.
Before the flashing begins, the respondent is shown a warning:
During this verification, the screen flashes bright colours for a few seconds. Flashing light can cause an epileptic seizure in a small number of people, so be careful if you have epilepsy.
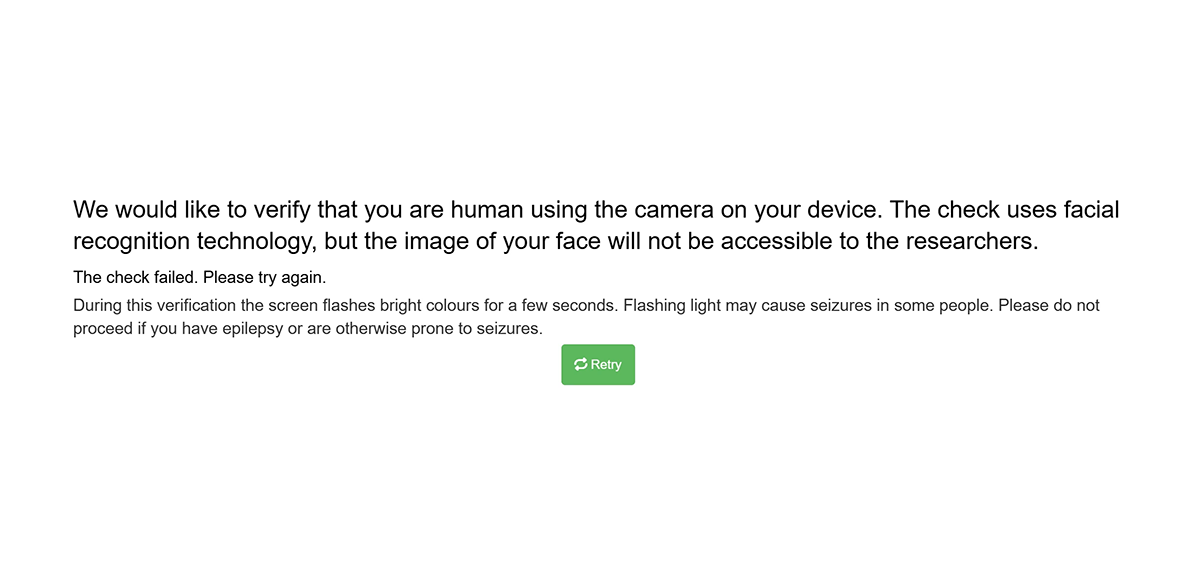
Because the flashing light is required for the liveness check to work, this warning is mandatory and cannot be disabled. If you need to route photosensitive respondents safely around the verification, place a screener question earlier in the survey, then use its result in the Camera verification question’s display logic to skip the check for those respondents.
If the check fails, the respondent is told that a live person could not be confirmed and is prompted to try again. The number of retries available is set when you configure the question.
Setting up a Camera verification question
- Navigate to the Add questions tab and click the button at the bottom of the page.
- On the Add or import questions pop-out, select the Add a new question tab, then under Miscellaneous click the question card.
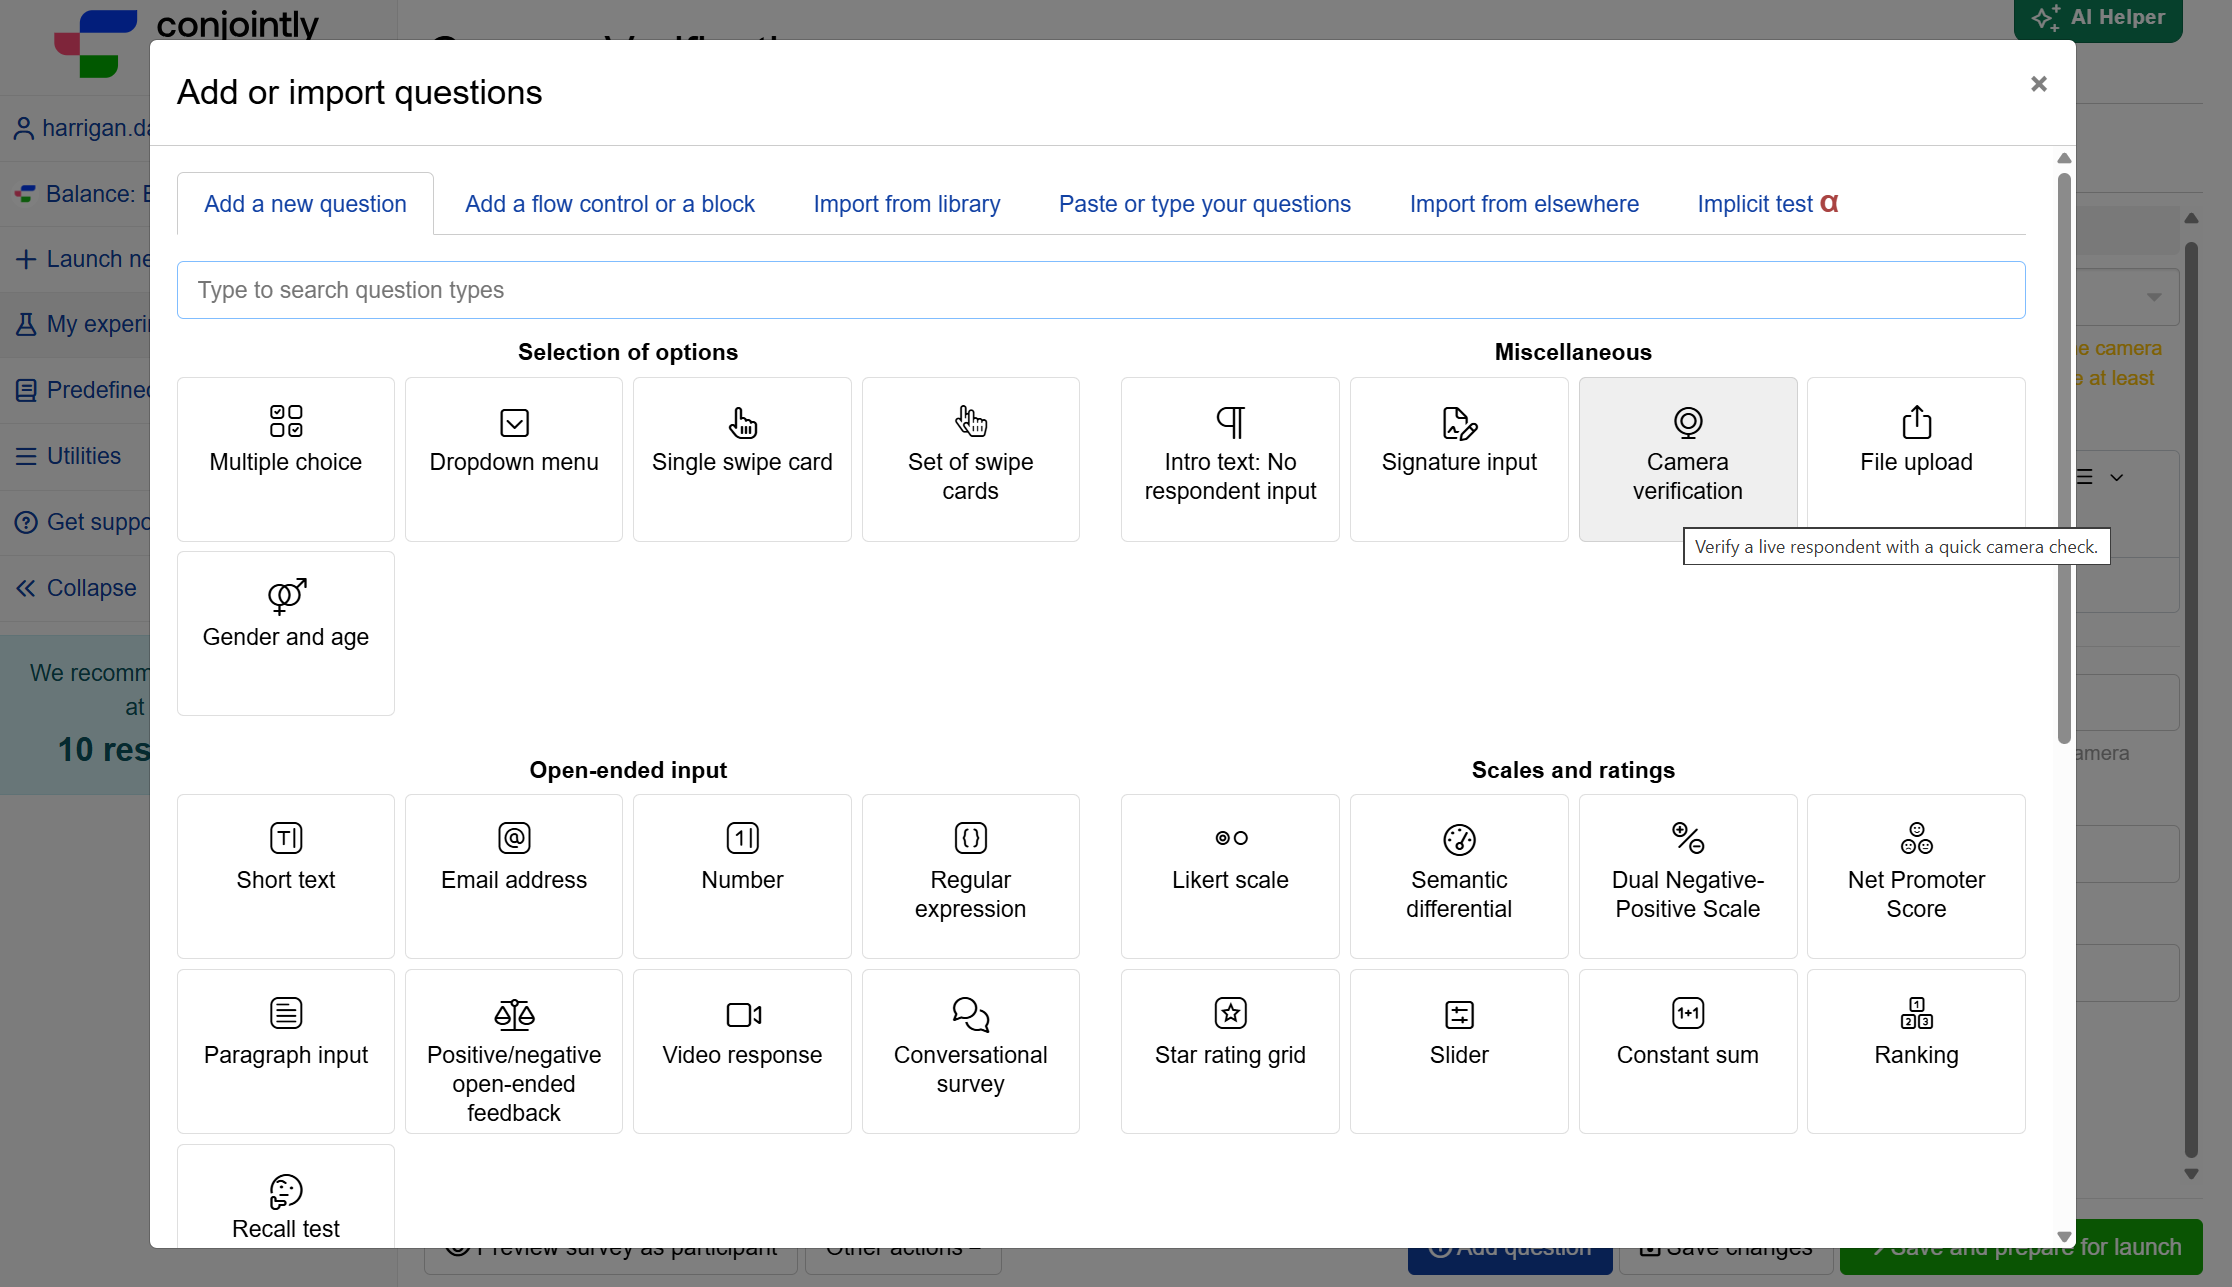
Adding the card actually inserts two items into your survey:
- Camera verification question: the liveness check itself. This question does not flag or filter respondents on its own. It only produces the pass-or-fail signal described above. Its question text is blank by default.
- Flag as low quality: a logic block that acts on the result. By default it flags respondents who fail the check as low quality.
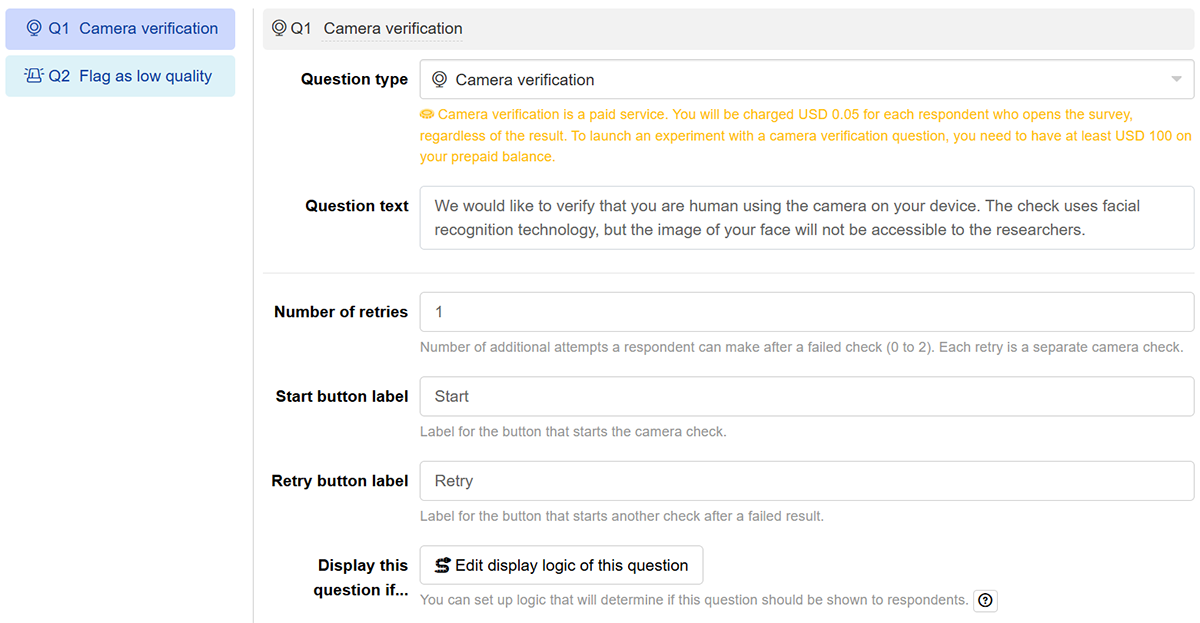
Once added, you can configure the following fields on the Camera verification question:
- Question text: Optional text shown to the respondent. Blank by default. You can include formatting and images.
- Number of retries: The number of additional attempts a respondent can make after a failed check (0 to 2). Each retry is a separate camera check.
- Start button label: The label for the button that begins the check.
- Retry button label: The label for the button shown after a failed check.
- Display this question if…: Optional display logic that determines whether this question is shown to a respondent.
Using the verification result
Because the Camera verification question only provides a signal, you decide what happens to respondents who pass or fail.
By default, the accompanying Flag as low quality logic flags failing respondents as low quality.
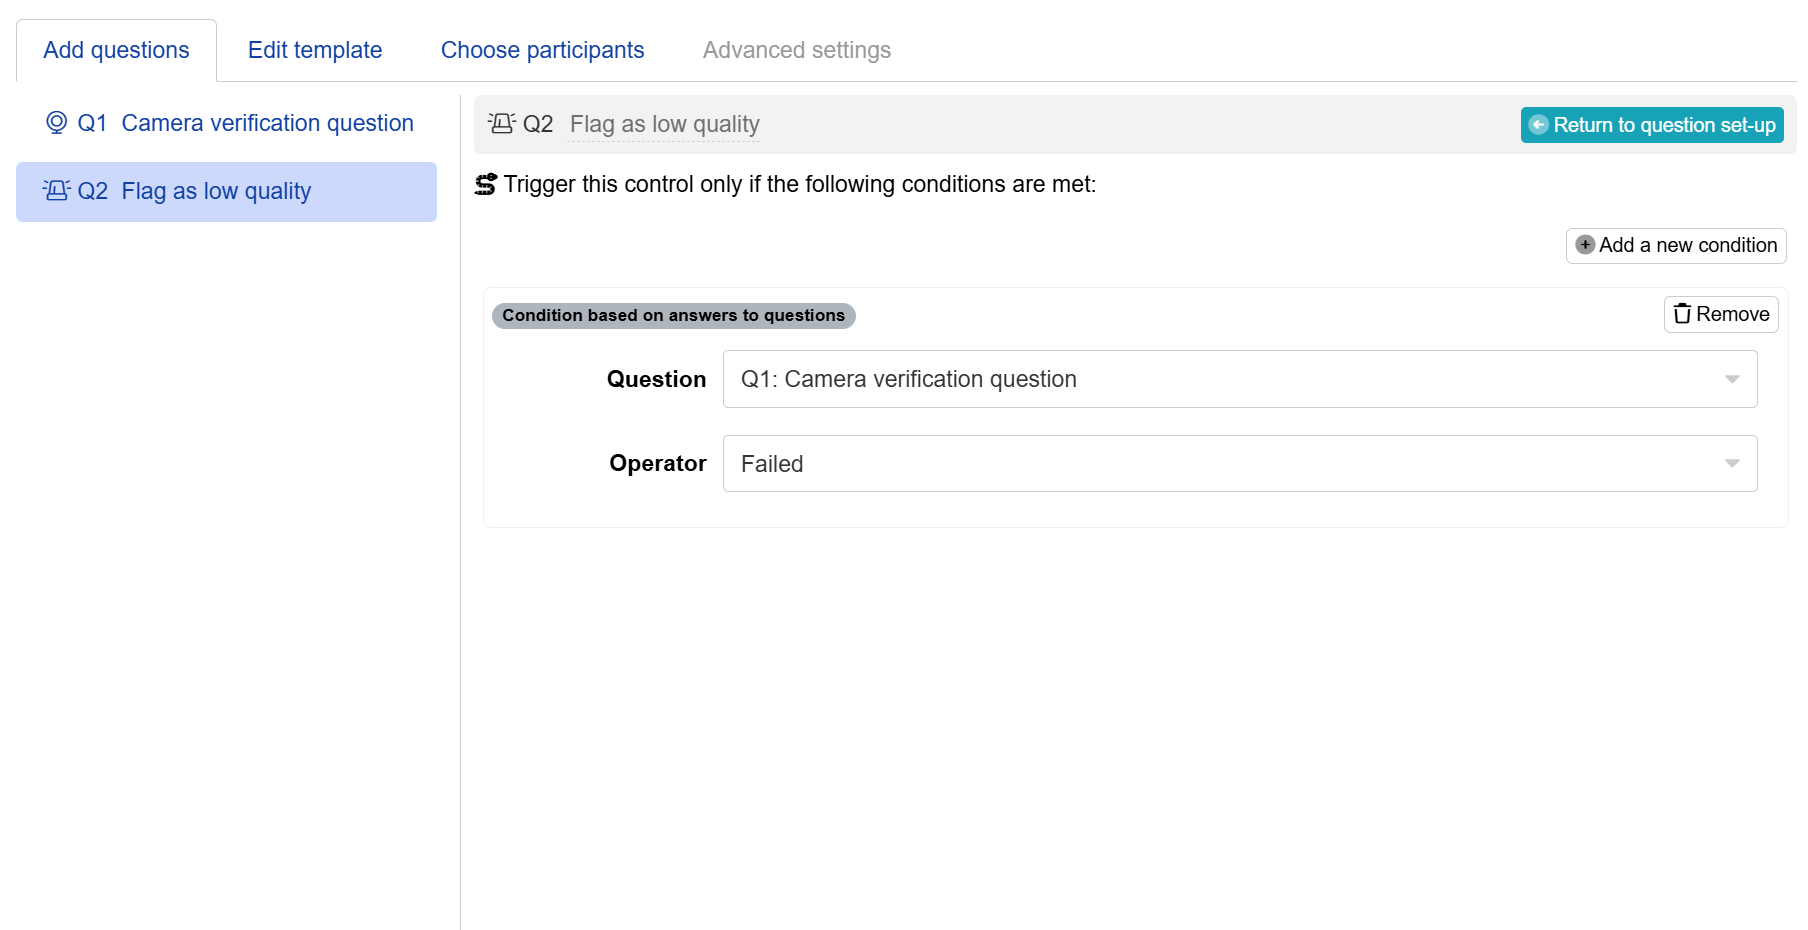
Flagged respondents can be viewed on the Review participants page for the experiment.

You are free to change or replace this default behaviour. Using the answer function in display logic or in formulas, you can, for example, show a different message when the check fails, branch respondents down a separate path, or combine the result with other conditions. See survey flow controls for the controls available to act on this signal.